Removing the needle plate |

A coin is perfect to
loosen the screws with. |
 Remove the
plate by lifting it slightly and sliding it out to the right. |

Remove the needle by
loosening the black screw. |
 Remove the
bobbin |
 |
|
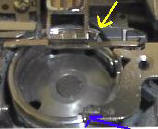
Turn the balance wheel
towards the front of the machine, to align the notch of the shuttle
(Red Arrow) with the right tip of the Race (inner rotary hook)
(Yellow Arrow).
 |
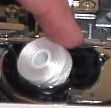
To Remove the Race,
push it gently towards the back,

and then lift the
edge nearest to you.
 |

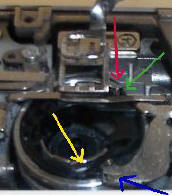
Oh, horrors, look at
this mess. |

Use a paintbrush to
loosen and remove the fluff/lint.
You can also use a
vacuum cleaner to suck the lint up. |

Slowly turn the balance
wheel towards the front of the machine, to turn the outer rotary
hook/shuttle so you can clean all the crevices. |
Before
placing the Race back , make sure the alignment is as it was when you
started.
Lip/shelf of the
Race is to the left of the silver spring. |
Race is back in
place |

Place the plate back |

Place the screws back |

Use your finger to
guide and tighten the screws initially and then use the coin for the
last turn or two. |

Place the needle back |

Everything back in place |